
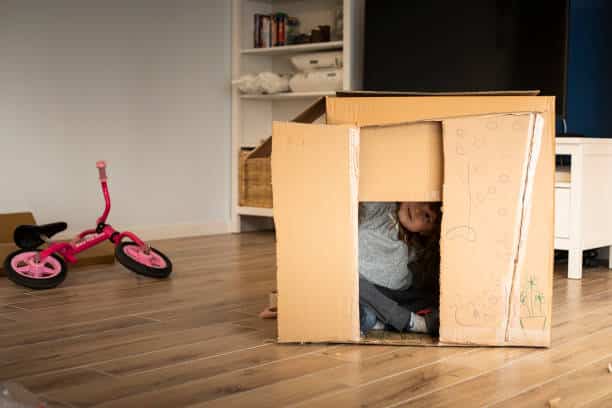
Have you ever dreamed of living in a cardboard house? This step-by-step guide here at Longpods Removals and Storage will provide you with all the information you need to build a cardboard house. From selecting the right materials and planning your design to assembling and decorating your cardboard house, this guide will help you create the perfect cardboard home of your dreams.
With a few simple tools, some cardboard, and a bit of creativity, you can create a unique, fun and safe environment for your living space. So, let’s get started and learn how to build your dream cardboard house!
Selecting the right materials to build a cardboard house
Choosing the right materials for your dream cardboard house is an important part of the planning process. Cardboard is a durable and strong material that can be used to create a safe and sturdy house that will last for many years. You can use corrugated cardboard, cereal boxes, or paper shopping bags to create your house.
Cardboard boxes that you have saved from moving or storage will work just as well as brand new cardboard. When choosing the type and size of cardboard to use for your house, you will need to consider the size of your planned design. The overall size of your design will impact the size of the cardboard needed for your house.
You will also need to consider the weight of the cardboard. The weight of the cardboard will impact how many sheets of cardboard you will need to create your house. The weight of the cardboard is determined by the thickness of the cardboard.
Thicker cardboard will add extra strength and stability to your design. You can use different colors of cardboard for your house, or paint the cardboard to create a unique design.
Planning your design to build a cardboard house
With the right cardboard, and the right tools, your dream cardboard house can be created in a matter of hours. However, before beginning construction, you will need to sketch out your design and plan your house. If you don’t have a blue print of your design, don’t worry, you can use a Build a Model Cardboard House to help you plan your design.
You will want to consider the following design factors when planning your house:
- The overall size of your design will impact the size of the cardboard needed for your house. You will want to consider the size of your design when deciding the length and width of your cardboard house. The size of your design will also impact the number of sheets of cardboard needed for your house.
- The larger the size of your design, the more sheets of cardboard you will need. The weight of the cardboard will impact how many sheets of cardboard you will need to create your house.
- The thicker the cardboard, the stronger and more stable the walls will be. You will want to make sure your walls are thick enough to support the weight of the roof and ceiling.
- The weight of the roof will also impact the number of sheets of cardboard needed for your design. A thicker roof will help support the weight of the roof, and will be less likely to cave in.
- Decide how many walls you want to include in your design. A single wall design will create a smaller space, while a multiple wall design will create a larger space.
Gathering your tools for a cardboard house
When you build a cardboard house, you will need a few basic tools to get started. A ruler, a pencil, a box cutter, a measuring tape, paper, and glue are all necessary tools for building your dream cardboard house. You will also want to consider investing in a few other tools to make building your house easier.
You can find many of these tools in your local hardware store or online. Use a hammer to nail your roof boards to the roof posts. A hammer will also come in handy for any other hammering tasks you may need to complete during your house building project.
Use nails to secure roof boards to the roof posts. Nails will also come in handy for nailing any other boards in your design.
Use staples to secure roof boards to wall boards. Staples will also come in handy for securing any other boards in your design.
Building the walls and roof for a cardboard house
The first step in building your dream cardboard house is to create the walls. You will want to create the walls before building the roof. The walls are necessary to hold the roof up and provide support for the rest of the design.
You will want to create two walls at the same time, so that the walls meet in the middle to create a corner. When creating the first two walls, you should leave a gap in the middle to create the door opening. For the following walls, you will want to leave a gap at the top to create the roof boards.
Once the walls are created, you can begin building the roof. The roof is the most crucial part of the house, so you will want to make sure it is built properly. You will want to use roof boards to cover the top of the walls.
You can nail the roof boards in place and secure them with staples. Once the walls and roof are created, you can move on to creating the ceiling.
Creating the interior after you built a cardboard house
Once the exterior walls and roof are created, you can begin creating the interior. You can use a variety of materials to create the interior of your dream cardboard house. You can use linoleum, cardboard, or carpet scraps to create a carpeted interior.
Use old curtains, fabric, or wallpaper to create a stylish interior design. You can also create a unique interior design by using items such as toys, books, DVDs, or artwork. Create a sink and toilet in your design by using a small cardboard box and toilet paper roll.
You can create a water spigot by using a small cardboard box and a rubber band. A toilet can be made using the cardboard box for the toilet bowl, toilet paper roll for the toilet paper spindle.
A rubber band for the toilet paper holder. You can create a sink by using a small cardboard box and a rubber band as the faucet.
Build a Cardboard House – Adding the final touches
Now that your dream cardboard house is created, you can finish the design. You can create a roof top deck by placing wooden boards on a roof and covering them with tin foil. Create a chimney by using a wooden board and covering it with tin foil.
Design a sign by using a wooden board and writing a message on the board using paint or markers. Make a welcome mat by placing small pieces of cardboard on the floor and covering them with linoleum.
You can create a flag pole by placing a wooden board on a wall and covering it with tin foil. Lastly, consider creating a mailbox by placing a wooden board on a wall and covering it with tin foil.